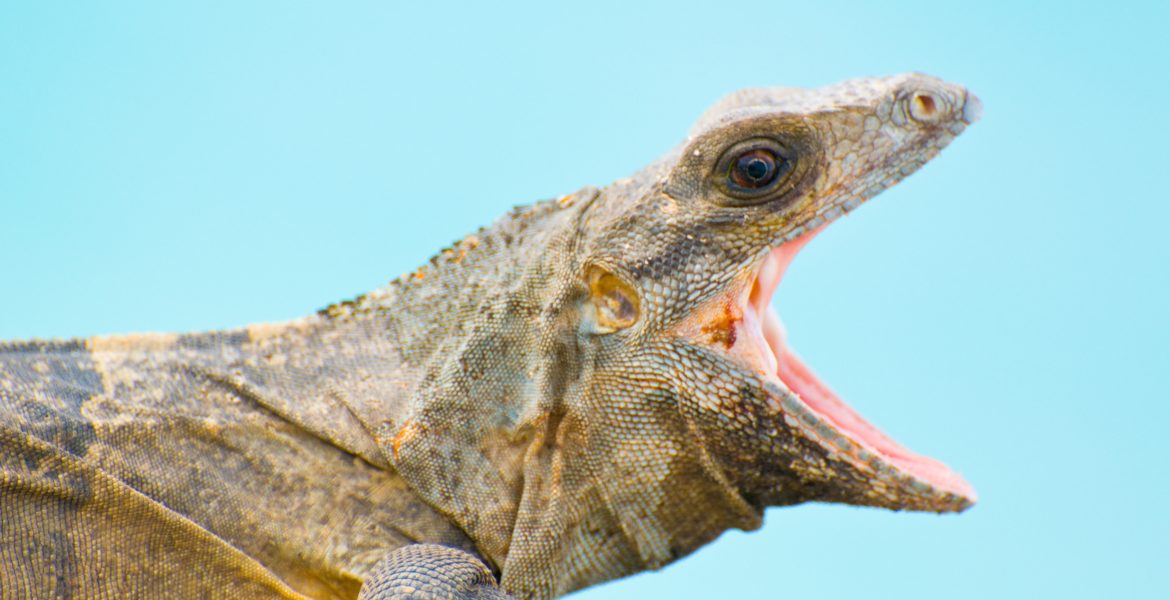
High Resolution Photos – Reptiles
Free Stock PhotosContents of this Post
High Resolution Photos: Free Stock Photos for Photographers, Bloggers, and Designers
Click on the button below any image below to download high resolution photos of reptiles for free use on your website, blog, print or digital media, or other project.
Copyright and Credit: Reptiles
How to Credit
All photos are property of Mod Fam Global LLC and offered for private and commercial use, free of charge. Please credit Mod Fam Global, LLC, https://modfam.global/ for any public, online, or print materials using our images.
Send us a Note
If you use any of our free high resolution photos of reptiles for online or commercial use, please send us a note and let us know how you used the photos. We love to see how our photography is being used, and we appreciate photo credit and links back to our site.
How to Photograph High Resolution Photos of Reptiles
Finding Your Subjects
Finding reptiles to photograph can be the most difficult part of creating beautiful images. The reptiles here are a combination of reptiles we discovered in the wild and in captivity. They range from docile, basically domesticated iguanas to boisterous caiman found in the jungles of Costa Rica. If you want to photograph reptiles, look at local resources first. You may find a rescue center or zoo that has reptiles you can view up close. A local university may have a natural science program with live reptiles or a herpetologist on staff. If you live in or visit tropical regions, reptiles are plentiful out in nature. Once you locate your subjects, you can plan your photo shoot accordingly, based on our recommended settings below.
Manual Settings – ISO, Light, and Noise
Depending on where you locate your reptiles, you may need to use the full range of ISO settings. For some of our photos here, we used the controlled conditions of a flash and lightbox. In other photos, we used natural light and environments to create a more contextualized image. For still others, we adjusted for low light conditions at an indoor wildlife rescue center. Remember: the higher the ISO setting, the more sensitive the sensor and the faster the exposure of the image. But with speed comes grain and noise, which affect the sharpness and quality of your final image.
Manual Settings – Recommended ISO
The ISO setting you select should be slightly higher than one you might use for a non-moving subject. This will allow you to capture images with less blur or movement, unless, of course, that is the effect you are attempting to create. Try to balance a higher ISO setting like ISO1250 or ISO1600 with other settings we discuss below. This will give you some speed and a faster exposure but minimize noise and grain in your image. With direct or bright light, you can even start at ISO800 or ISO640 with excellent effect.
Manual Settings – Aperture and Depth of Field
First, select your ISO. Next, choose an aperture that balances depth of field with the amount of light you need to create a crisp image. Keep in mind that a lower aperture or f-stop like f4.5 opens the aperture wide. This allows much more light in to the camera, exposing more light more quickly. The trade-off, though, is a shallow depth of field. Open your aperture too much, and you risk blurring too much of your subject to the front and back. Close down your aperture at f22, for example, and you will not have enough light to expose your subject without visible motion and blurring.
Manual Settings – Recommended Aperture
For reptiles like these, we typically select an aperture around f7.1. This allows for bokeh (blurring) around the subject, but keeps the reptile’s body in focus. For macro shots, though, you may want to use the narrowest possible aperture, f4.5 or wider. As in our top image of the caiman, this can focus your image on one feature of the reptile, blurring the rest. Using aperture in this way can create a stunning image, different than the other visual effects and techniques you see here.
Manual Settings – Shutter Speed
Once you have selected a balanced ISO and aperture, the final consideration is shutter speed. Automatic settings on a camera will auto-balance shutter speed and aperture for an averaged light reading of the entire frame. We set the shutter speed and other settings based on the type of image we are trying to create. Do you want to brighten the background and adjust for darker portions of the lizard’s body? Then reduce your shutter speed to let more light in. Want to darken the shot and adjust for the brightest part of the lizard’s head and face? Then select a faster shutter speed to reduce the amount of light exposed.
Manual Settings – Recommended Shutter Speed
Ultimately, your shutter speed cannot be separated from your ISO and aperture. Too fast, and you will have dark images that loose critical visual detail. Too slow, and you will blow out the highlights and overexpose your image, permanently eliminating entire sections of your image. This is where you can experiment once you set your ISO and aperture. Try a combination of shutter speed and aperture like f7.1 and a shutter speed of 1/160 at ISO800. In light like the image below, this will probably give you a good starting point. Is the image still too dark? Adjust your shutter speed down to 1/100 or 1/60. If it is too bright and blown out, adjust shutter speed up to 1/500 or 1/1000. You can also start with the camera’s automatic setting for an averaged baseline and then switch to manual to experiment.
Manual Settings – Final Considerations
Considering the above regarding shutter speed, it is important to remember the threshold for taking a still hand-held image. Without any type of vibration control in a lens, 1/60 is about as slow as you can shoot and still get a crisp, hand-held image. Other variables will affect this, of course. But when shooting small, fast-moving reptiles, you will most likely want to shoot at a much higher speed than 1/60. You may have to push your ISO up to ISO1600 or 2000, or open your aperture a bit to compensate. If you can get your shutter speed to faster than 1/250, you’ll have a better chance at a crisp image without motion blur.





Such beautiful and stunning photographs. Thanks for sharing them!
Thank you for all you are doing, I will start visiting this site for educational photos.
Now I know where to Find the best free stock images about reptiles. would love to Download all photos and use them even for commercial projects!
Such beautiful pictures. I love reptiles, I am not kidding! That creeps my husband but I really love a lot of reptiles!
Such a beautiful and stunning photography you have here. and its really that is downloadable.
wow, that’s pretty cool that you share these pictures for people to download – they are really good 🙂
These photos are so nice. I would love to take some of these photos next time for my post. I will let you know.
Thanks, Jack! Glad you enjoyed the photos. Check out our other stock photo galleries, too. We have lots to choose from!
Wow! I’ve never encountered anyone who was so generous in sharing their photos! Do you only photograph reptiles?
Thanks, Ching! We have lots of different collections of stock photos including everything from landscapes and nature to animals, architecture, special events, and more. Check out our other galleries…all of our photos are free to download and use.
Wow! This Photograpger really knows what he’s doing. These images are so crisp and clear.
These are SO COOL! I have friends that are obsessed with reptiles, I’ll have to share this with them!
Awesome Krysten! We know reptiles aren’t for everyone, but it’s hard to pass up a good close up photo of a caiman or iguana! Thanks for sharing.